
16 Aesthetic Christmas Nail Designs You’ll Want to Copy
Holiday manicures usually swing between two extremes: plain cherry red or loud, chunky glitter that feels impossible to match with everyday winter knits. You want festive details that feel intentional, modern, and clean enough for daily wear.
Finding aesthetic christmas nails comes down to subtle textures and smart contrast. Think velvet finishes, sheer milky bases with micro chrome stars, and deep cranberry accents that transition smoothly from office days straight into family dinners.
These designs focus on wearable holiday style rather than novelty art. You will spot fresh french tip twists, understated pine greens, and pearl details that look just as good holding a warm mug as they do at an evening gathering.
Save your favorites to your holiday Pinterest board before your salon appointment. Every look below includes specific color pairings, clear finish details, and practical tips to help you recreate the exact set at home or in the chair.
1. Deep Ruby Velvet Red Cat-Eye Nails
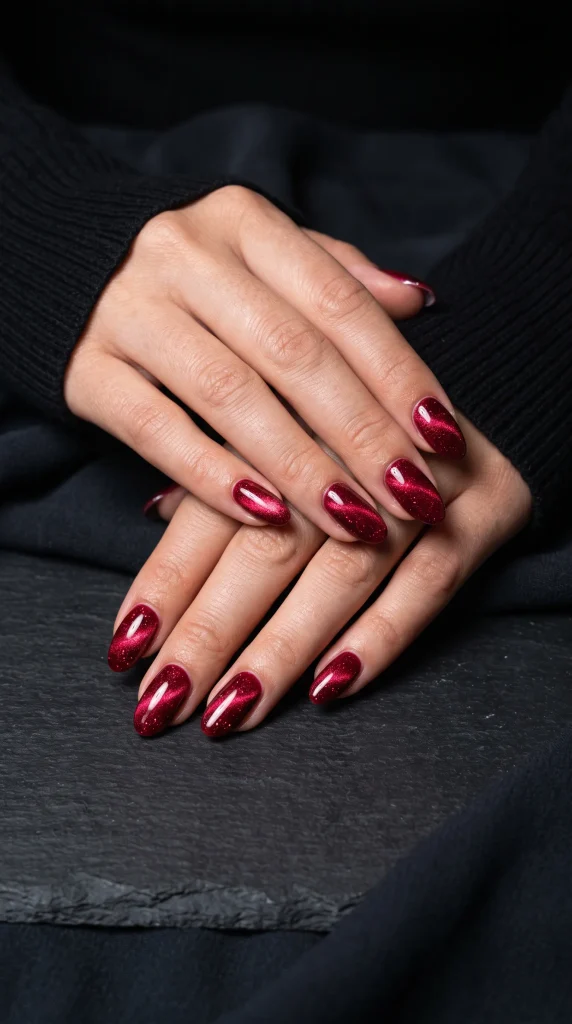
Almond-shaped nails coated in a rich, multidimensional ruby red magnetic gel create the softest lit-from-within glow under holiday lights.
Instead of traditional chunky craft glitter, the magnetic particles pull toward the center of each nail to mimic the plush texture of holiday ribbon. It keeps a classic red manicure looking modern and grown-up without needing extra nail art on top.
- Base color: Deep wine or crimson jelly polish
- Finish: Glossy gel top coat with diffused magnetic shimmer
- Best nail shape: Medium oval or soft almond
2. Ultra-Glossy Jelly French Tips
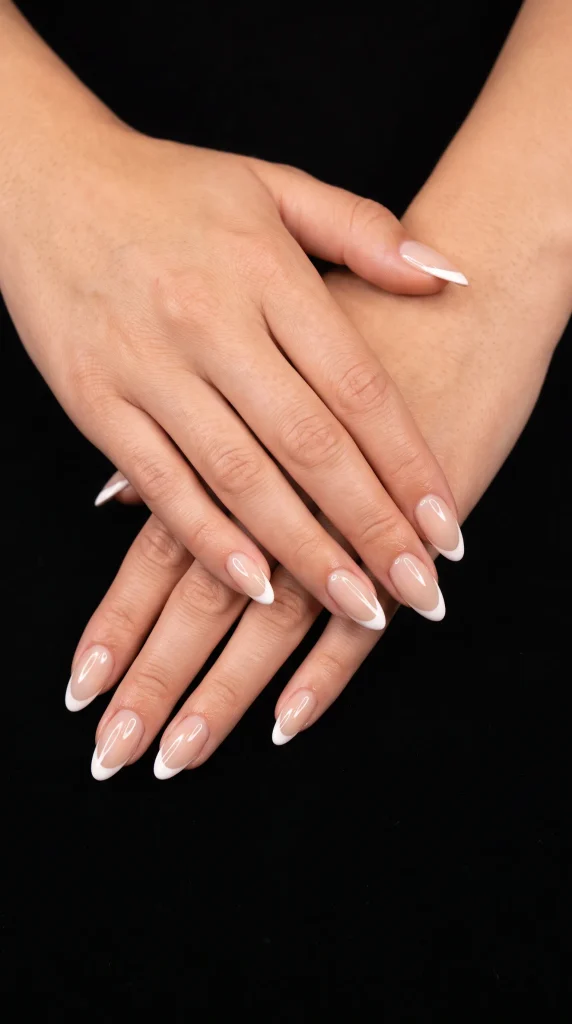
A sheer, skin-toned jelly base paired with crisp winter white tips delivers a clean aesthetic that never clashes with chunky knit sweaters or festive party dresses.
Keep the smile line drawn slightly deeper on the sides. Bringing the white line further down the lateral walls elongates the fingers, making medium almond or oval shapes look twice as slender.
Recreate this look
3. Deep Emerald Foliage and Gold Starburst Nails
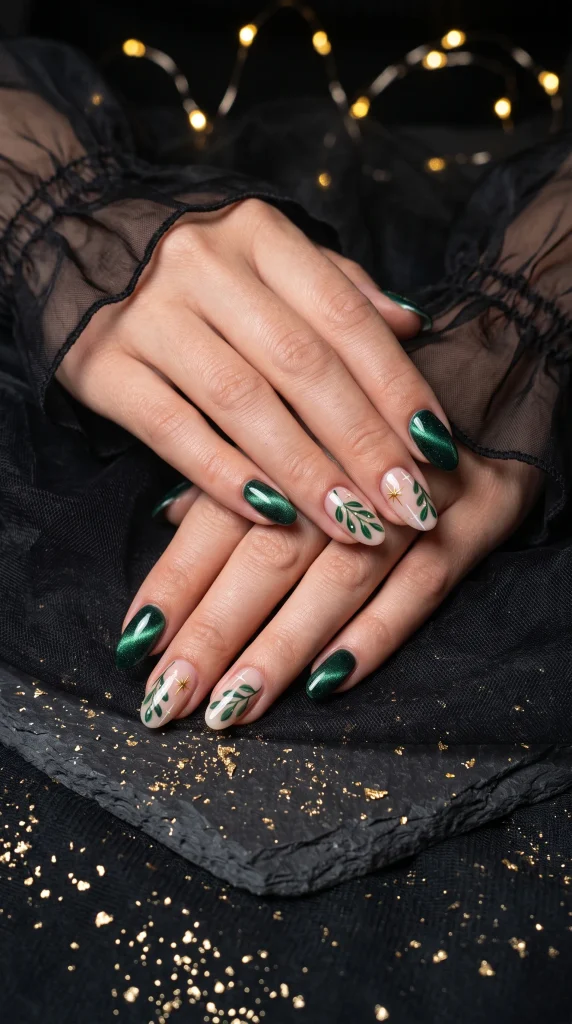
Deep forest green shimmer paired with bare nude accent nails gives rich holiday color without feeling heavy on every finger.
Golden starbursts hand-painted over the dark glitter nails catch the light like tree ornaments, while the middle nails feature delicate hand-painted pine leaf foliage over a clean negative-space base. Balancing dark moody shades on the outer nails with airy, botanical art on the center fingers keeps the entire manicure feeling fresh and modern.
4. Velvet Burgundy Ribbon and Polka Dot Nails
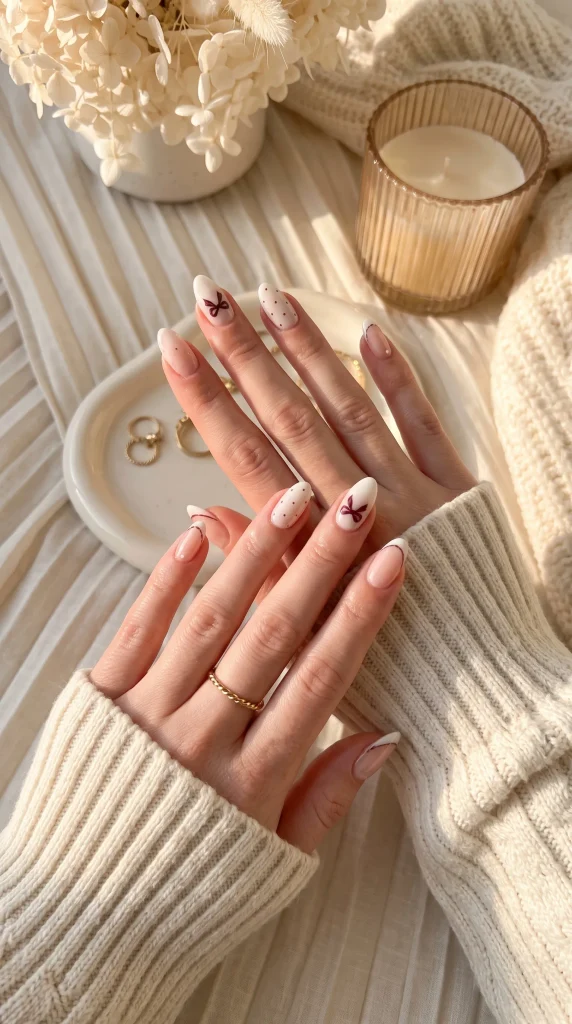
Milky cream bases create the ideal canvas for dainty coquette styling during the colder months. Deep burgundy hand-painted ribbon loops sit neatly on the accent nails, instantly channeling the look of wrapped holiday gifts without feeling overly loud or cluttered.
A tiny detail brush keeps the linework delicate, while subtle polka dots bring a playful vintage energy.
Pairing sheer nude French tips with tiny micro bows on the smile line ties the mismatched set together. The creamy off-white contrast feels warmer against winter wool coats than stark snow white, keeping every nail balanced, feminine, and clean.
💡 Quick Tip
Use the rounded tip of a metal bobby pin or an ultra-fine dotting tool for uniform micro dots across the nail bed.
5. Glazed Pearl Chrome Holiday Manicure
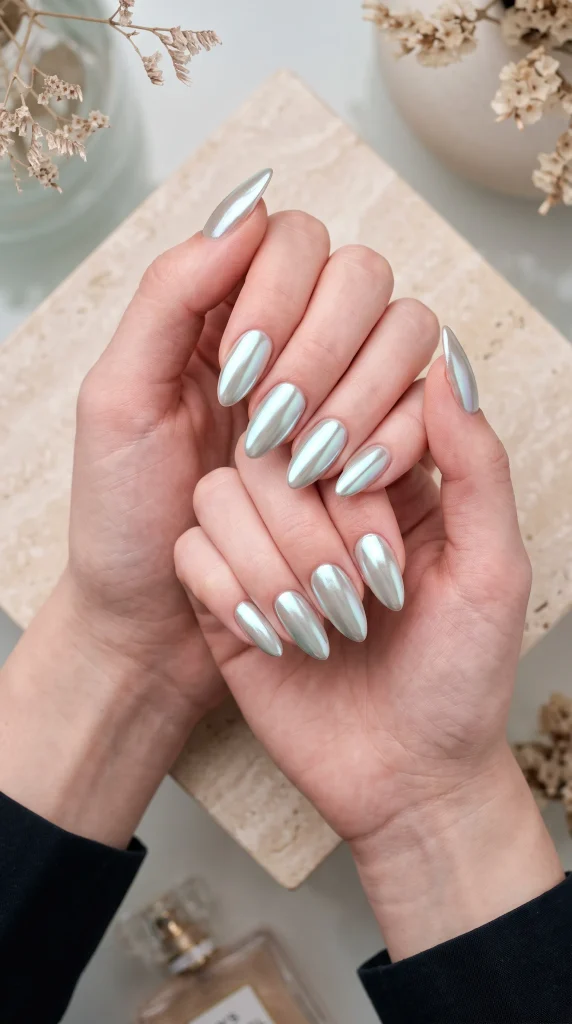
A clean, semi-sheer milky base buffed with fine white chrome powder creates an ethereal glazed glow. The reflective surface catches cool silver and pale icy pink tones as your fingers move, mimicking the soft sheen of fresh frost on winter mornings.
The mirror-like finish feels high-end without relying on heavy glitter or hand-drawn nail art.
- Base Layer: Sheer milky nude gel applied evenly in two thin coats.
- Chrome Application: Fine white pearlescent powder buffed over a no-wipe gel top coat.
- Edge Sealing: Extra swipe of clear gel along the free edge prevents chrome tip-wear.
| Glazed Pearl Chrome | Standard White Gel |
|---|---|
| Multidimensional mirror reflection that shifts in natural light. | Flat cream finish with uniform opaque coverage. |
| Pairs smoothly with silver and warm gold jewelry alike. | Can look harsh or chalky against very fair winter skin tones. |
6. Frosted Starlight Ombré Nails
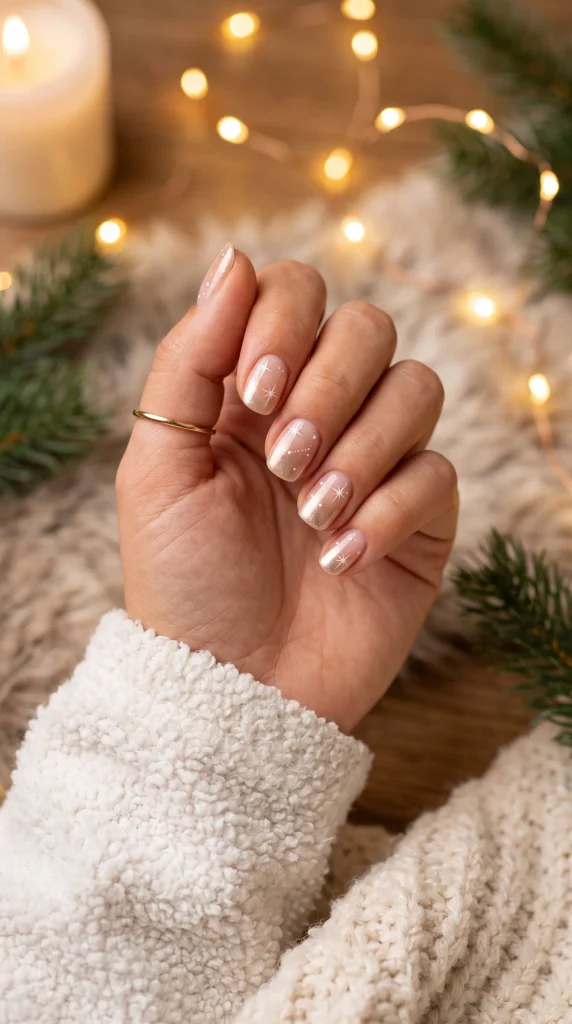
A soft sheer wash of neutral pink makes short, squared nails look clean and instantly brightened.
Fine silver-champagne shimmer fades gently down from the free edge toward the center, mimicking natural frost on glass. Crisp white starbursts painted directly over the metallic gradient create focused points of interest on every finger without crowding the nail bed.
Tiny micro dots scattered around each star suggest falling snow and catch the reflection of indoor holiday lighting.
Sponge a soft champagne silver shimmer lightly onto the tips for an airy ombré blend.
Draw four intersecting tapered lines with opaque white gel paint using a striping brush.
Scatter micro dots around the stars before sealing with a high-shine clear top coat.
7. Glossy Cranberry Syrup Gel Nails
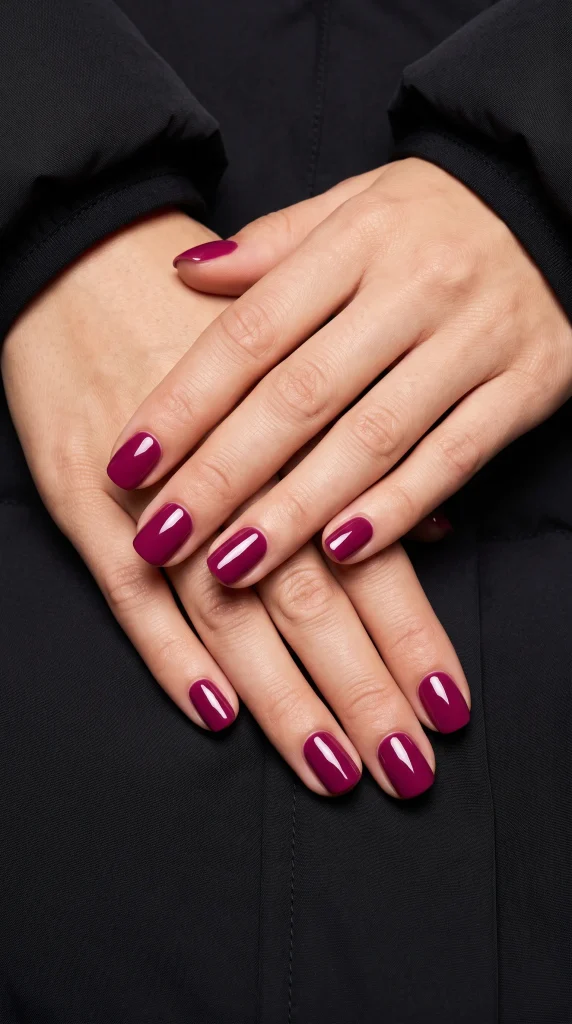
Translucent berry hues offer a juicy alternative to heavy winter creams. The syrup-like consistency lets light pass straight through the pigment, creating deep rich color around the nail edges while keeping the center softly illuminated and clean.
A neat squoval shape keeps this glossy berry shade looking tailored and effortless for everyday tasks.
Layering sheer coats creates depth that never looks cakey or thick around the cuticles. It feels fresh through December holiday parties and easily carries straight into January without looking tied to one specific holiday theme.
The sheer jelly formula gives bold red tones a softer, mirror-like depth that suits short natural lengths.
8. Embossed 3D Cable Knit Sweater Nails
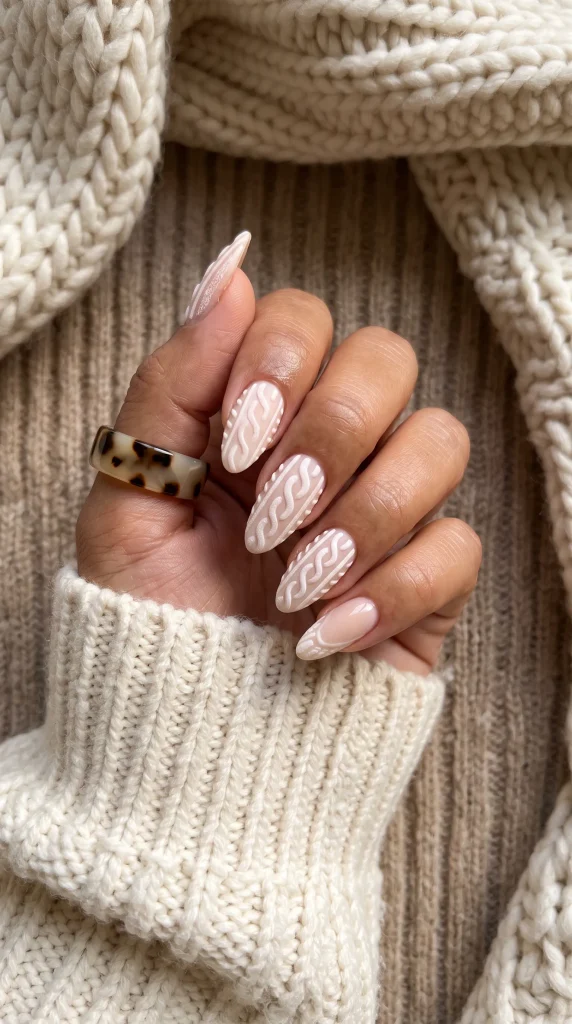
Raised white acrylic gel patterns create tactile knitwear braids across a soft matte nude base. Leaving organic negative space near the cuticles keeps the 3D texture looking modern and airy rather than heavy on every finger.
Dusting fine clear acrylic powder over the wet gel linework before curing gives the cable knit its signature powdery matte finish. It matches the cozy feel of chunky cardigans and winter wool beanies.
- Base Layer: Sheer neutral matte nude builder gel.
- Texture Detail: Opaque white gel piped in braid patterns and dusted with acrylic powder.
- Silhouette: Slender oval or soft tapered almond tips.
Two-dimensional painted lines that can look flat under daylight and easily smudge during top coat application.
Raised tactile ridges cured with powder for an authentic wool sweater feel and zero surface glare.
9. Candy Cane Swirl and Ruby French Tips
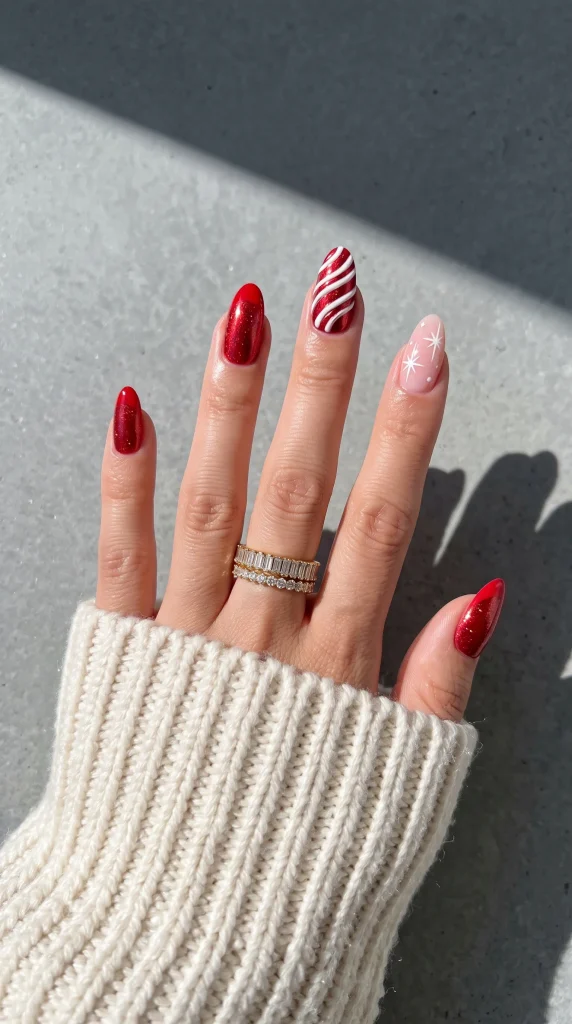
Classic peppermint stripes get a chic upgrade when mixed with deep metallic red accents. Painting alternating fine white and ruby glitter ribbons across one feature nail brings instant holiday charm without overwhelming the entire hand.
A sheer pink base keeps the surrounding fingers grounded, balanced, and fresh.
The French tips feature a deep crimson curve bordered by an ultra-thin white smile line, echoing the candy cane theme in a subtle way. A single hand-painted snowflake on the pointer nail finishes the festive look with delicate holiday contrast.
Use an ultra-long liner brush to pull smooth diagonal stripes in one steady motion.
Restrict full candy cane striping to one accent finger to maintain an aesthetic balance.
Do not paint thick, blunt red stripes that hide the clean white base underneath.
Avoid rushing into top coat before red gel stripes are fully cured to prevent bleeding.
10. Iridescent Opal Snowflake Almond Nails
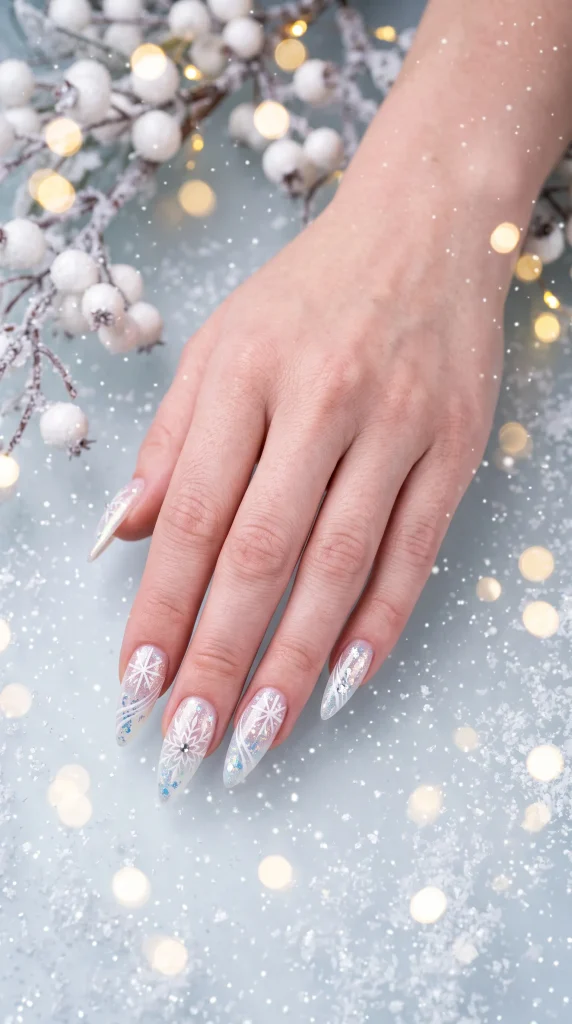
Translucent milky extensions embedded with iridescent foil flakes create a frozen ice pond reflection across the nail beds. The opal base shifts between pale lavender, soft silver, and icy peach under different angles of winter daylight.
White hand-painted branching snowflakes float directly over the shimmery glass layers to give the design multidimensional visual depth.
Tiny round rhinestones tucked near the base of each cuticle anchor the snowflake art without feeling bulky or snagging on knit sweaters.
- ▸Embed thin iridescent foil shards into wet builder gel before curing for authentic ice depth.
- ▸Flash cure the white snowflake linework for ten seconds to stop pigment spreading into the shimmer.
- ▸Encapsulate stones with a dense top coat border so they survive holiday gift wrapping.
11. Abstract Pine Garland and Gold Foil Nails
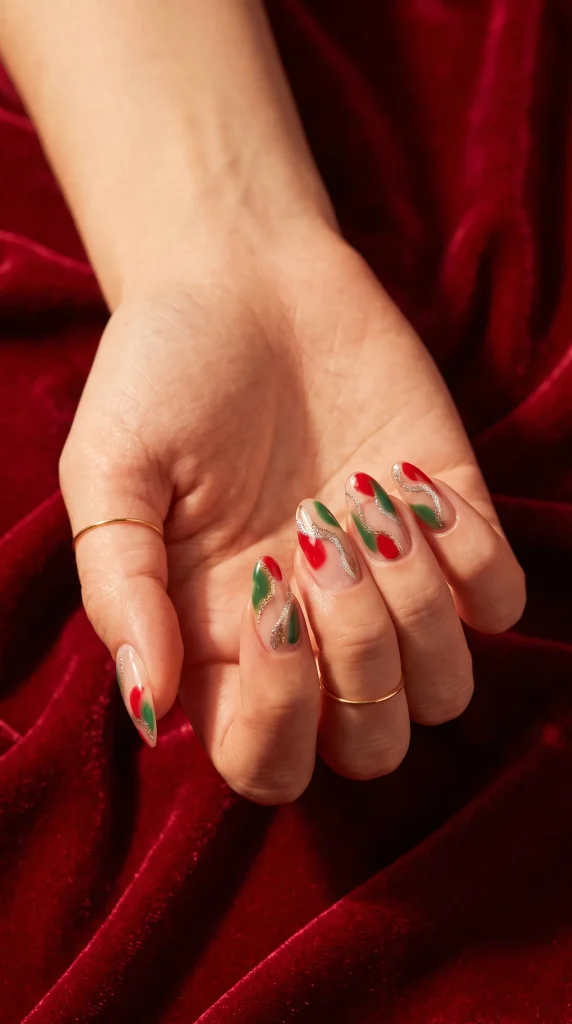
Bare negative-space gel extensions provide a clean modern base for festive color blocking. Swaths of metallic gold glitter hug the tips and sidewalls, catching bright ambient holiday lighting while keeping the natural nail bed completely translucent.
Rich festive tones float across clear tips like modern holiday confetti.
Muted evergreen patches evoke miniature pine garlands alongside bold splashes of red berry lacquer. Wavy silver lines trace between the colors, connecting the playful shapes into a cohesive seasonal set that never feels crowded or formal.
12. Champagne Gold Glitter Cascade Nails
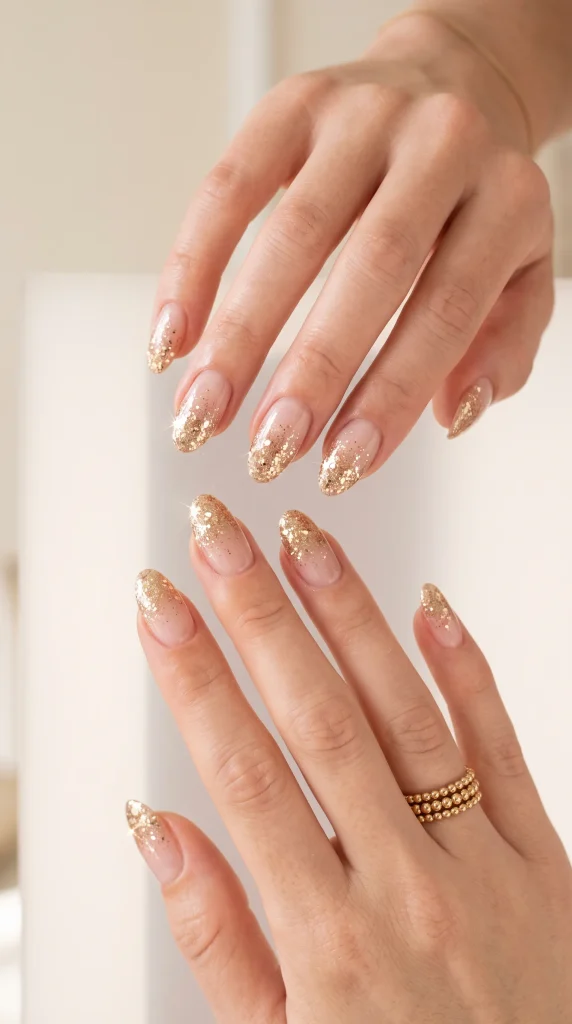
A sheer, milky nude foundation keeps this manicure grounded while dense champagne glitter coats the tips. Chunky metallic flecks blend into finer micro shimmer as they drift toward the cuticle, catching warm ambient candlelight at holiday dinners.
Soft gradients give luxury shimmer without feeling heavy or full coverage.
The gentle fade makes new growth nearly invisible, giving you a manicure that lasts effortlessly from Christmas celebrations straight through New Year’s Eve parties without chipping or looking dull around the free edge.
Concentrating the glitter strictly on the top third allows negative space near the cuticle, keeping the look refined.
13. Winter Holly Berry and Cream Accent Nails
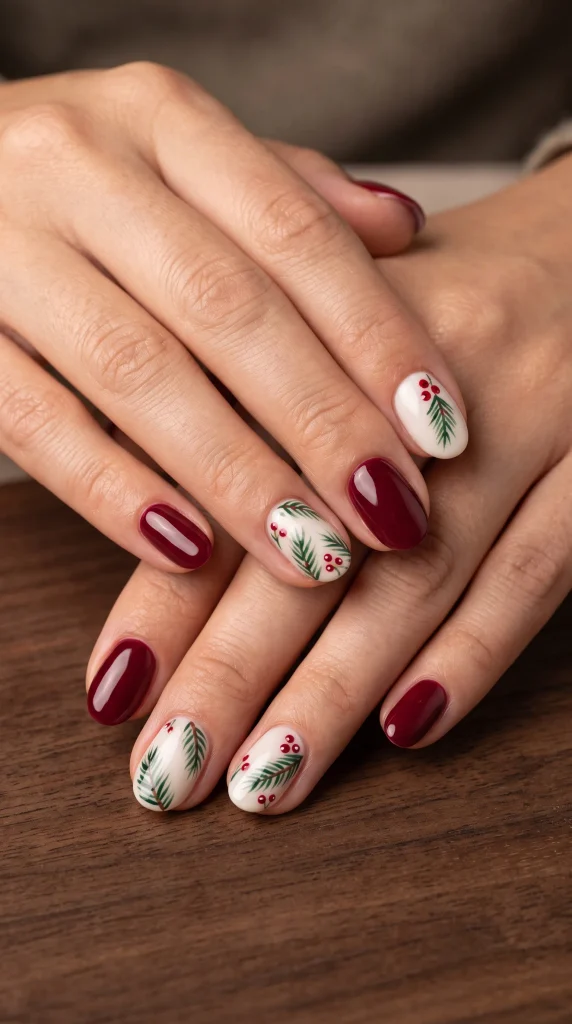
Deep glossy oxblood red delivers classic holiday richness across the outer fingers. The dark wine tone anchors the manicure, letting two cream-painted accent nails brighten the center with clean contrast that feels festive rather than loud.
Hand-painted evergreen sprigs bring natural botanical texture to an understated winter palette.
Tiny red berry clusters dotted along the green pine leaves tie the entire set directly into the darker nails. A thick coat of glossy gel seals the fine handiwork, keeping the artwork crisp and protected against daily winter wear.
14. Deep Forest Green Magnetic Cat-Eye Nails
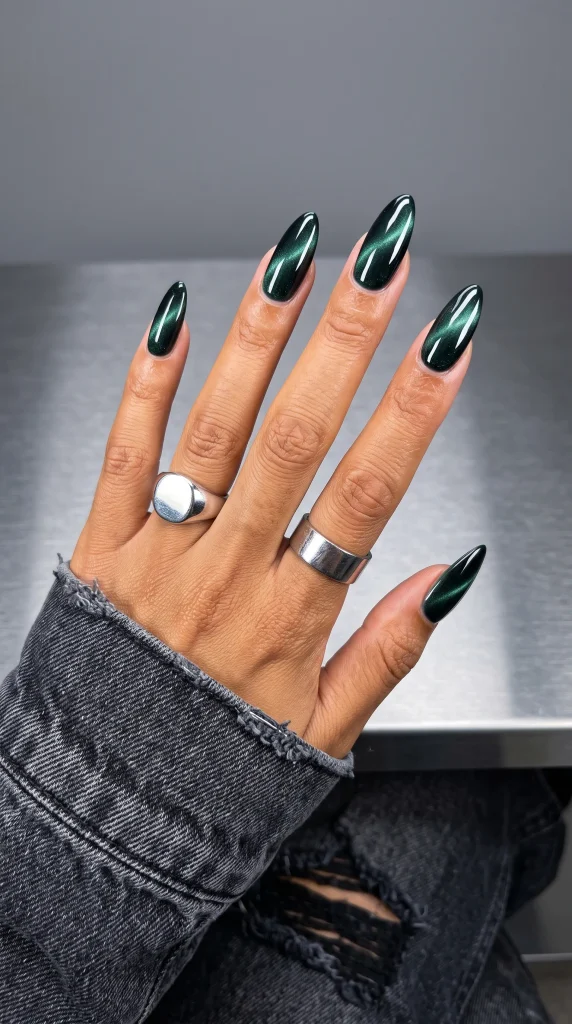
Dark evergreen magnetic polish brings the mysterious depth of winter pine needles straight to long almond nails. The fine metallic pigment reflects light down the center of each nail bed, giving the illusion of polished gemstone or liquid velvet moving under natural light.
A jet-black gel foundation beneath the green magnetic coat intensifies the shadow around the sidewalls.
- Undercoat Base: One coat of opaque obsidian black to maximize contrast.
- Magnetic Effect: Cylindrical magnet held diagonally to pull a sharp emerald slash.
- Top Layer: Non-wipe mirror shine gel cured for forty seconds.
The rich botanical hue works as an understated neutral that coordinates effortlessly with heavy winter outerwear and cold-weather denim without feeling overly tied to novelty holiday icons.
15. Warm Chestnut Tartan French Tips
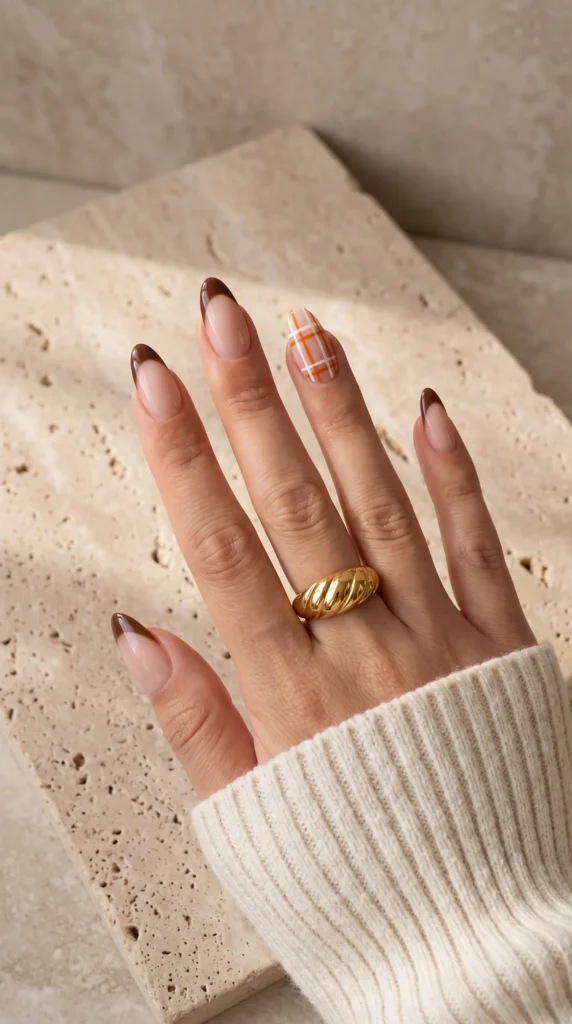
Rich chocolate and chestnut tones bring a cozy, fireside feel to winter manicures. Instead of covering the entire nail bed, these warm hues coat the free edges in an extended French smile line over clean, sheer pink builder gel.
Crisp grid lines instantly turn an everyday tip into festive flannel.
Fine white and warm amber stripes intersect across the accent nails to create a clean holiday plaid effect. The sleek almond silhouette keeps the pattern looking refined rather than bulky, pairing easily with neutral wool coats and gold rings.
16. Sheer Shimmer and Floating Pearl Caviar Nails
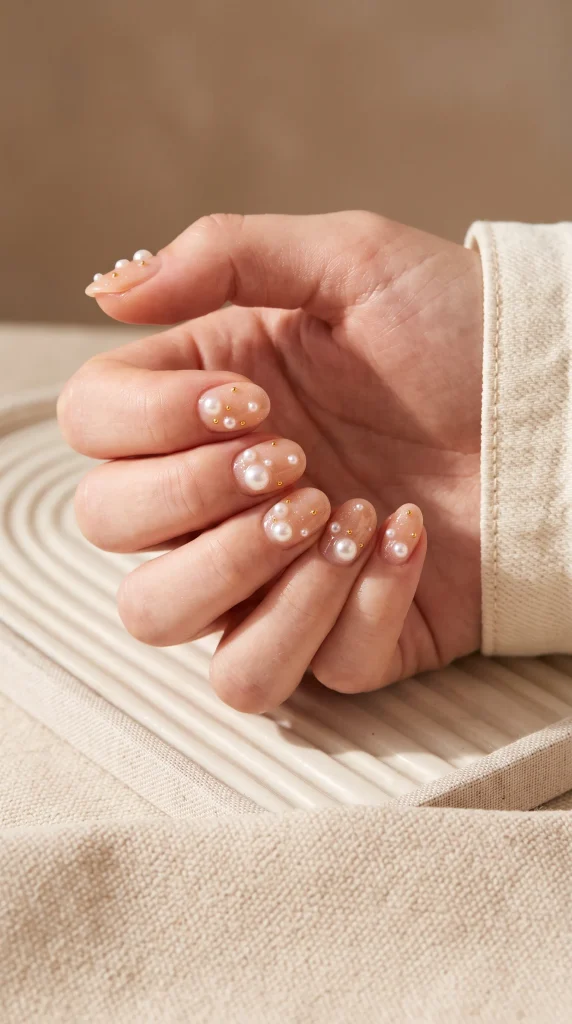
A translucent, light-catching shimmer wash keeps short rounded nails looking clean, delicate, and festive without heavy polish buildup.
Scattered flatback pearls in mixed sizes create a soft bubble effect across each finger. Tiny gold micro caviar beads nestled right against the pearl edges bring just enough warm metallic contrast to tie into holiday jewelry.
Embedding each bead directly into a drop of clear builder gel keeps the 3D embellishments secure through holiday gift wrapping and winter sweater season.
⚠️ Watch Out
Never paint your final top coat directly over the pearl surfaces, as clear gel blurs their luster. Instead, use a micro liner brush to seal only around the base of each pearl and caviar bead to anchor them securely.
Styling Aesthetic Christmas Nails at Home
Achieving clean holiday nail art does not require complex hand-painting skills or hours in a salon chair. Using simple techniques like fine glitter tip ombré, magnetic cat-eye polish, negative-space striping, and subtle pearl accents lets you build wearable festive sets in minutes.
Lock in your designs with a thick, plumping gel top coat to prevent chipping through holiday gift wrapping, dinner prep, and cold winter weather. The result is a refined manicure that complements chunky knitwear and evening party outfits all season long.
Frequently Asked Questions
How do I get the velvet cat-eye effect without special salon tools? +
You only need magnetic cat-eye gel polish and a small handheld neodymium magnet. Hold the magnet diagonally across the wet polish for 10 to 15 seconds without touching the surface to pull the shimmer particles toward the center, then cure immediately under a UV or LED lamp.
Which Christmas nail designs look best on short natural nails? +
Glazed pearl chrome finishes, rich cranberry jelly polishes, micro glitter cascades, and floating pearl accents suit short lengths best. Because they focus on light reflection and sheer negative space rather than sprawling artwork, they keep the nail bed looking elongated and clean.
How do I prevent 3D pearls and caviar beads from falling off? +
Press each embellishment directly into a bead of clear builder gel or rhinestone resin before curing. After setting the base, use a fine liner brush to paint topcoat around the crevices and perimeter of each bead rather than painting directly over the pearl tops, preserving their sheen while locking them in place.
How do I paint fine plaid stripes and candy cane lines cleanly? +
Use an extra-long, ultra-thin striping brush rather than a short detail brush. Anchor your pinky finger against the table for hand stability, drag the bristles in one light, continuous pass, and flash cure each stripe for 10 seconds so the pigment does not blur into the base.